Natural lighting is a powerful tool for portrait photography. Unlike artificial lighting, which can often create harsh shadows and an unnatural look, natural light provides a softer, more flattering effect. Understanding how to use natural lighting effectively can elevate your portraits from ordinary to extraordinary.
The key to mastering natural lighting is to understand its various qualities—intensity, direction, and color. Each of these elements plays a critical role in how your final image will look. Learning how to control and manipulate these aspects of light will allow you to create beautifully lit portraits every time.
The Best Times to Shoot: Golden and Blue Hours
One of the first things to consider when using natural lighting is timing. The time of day significantly impacts the quality of light. For portrait photography, the golden hour and blue hour are ideal times for capturing stunning images.
Golden Hour: This occurs shortly after sunrise or before sunset when the sun is low on the horizon. The light during this period is warm, soft, and diffused, making it perfect for portrait photography. The golden hour light minimizes harsh shadows and creates a beautiful glow on the skin.
Blue Hour: This is the period just before sunrise or after sunset, when the sun is below the horizon but still illuminates the sky. The light during the blue hour is more relaxed, with a bluish tint. This soft, even lighting is perfect for creating a moody and ethereal atmosphere in your portraits.
By planning your shoots around these times, you can take advantage of the best natural lighting conditions.
Positioning Your Subject for Optimal Lighting
Positioning your subject relative to the light source is crucial in natural light portrait photography. The direction of light affects the shadows, highlights, and overall mood of your image. Here are some techniques to consider:
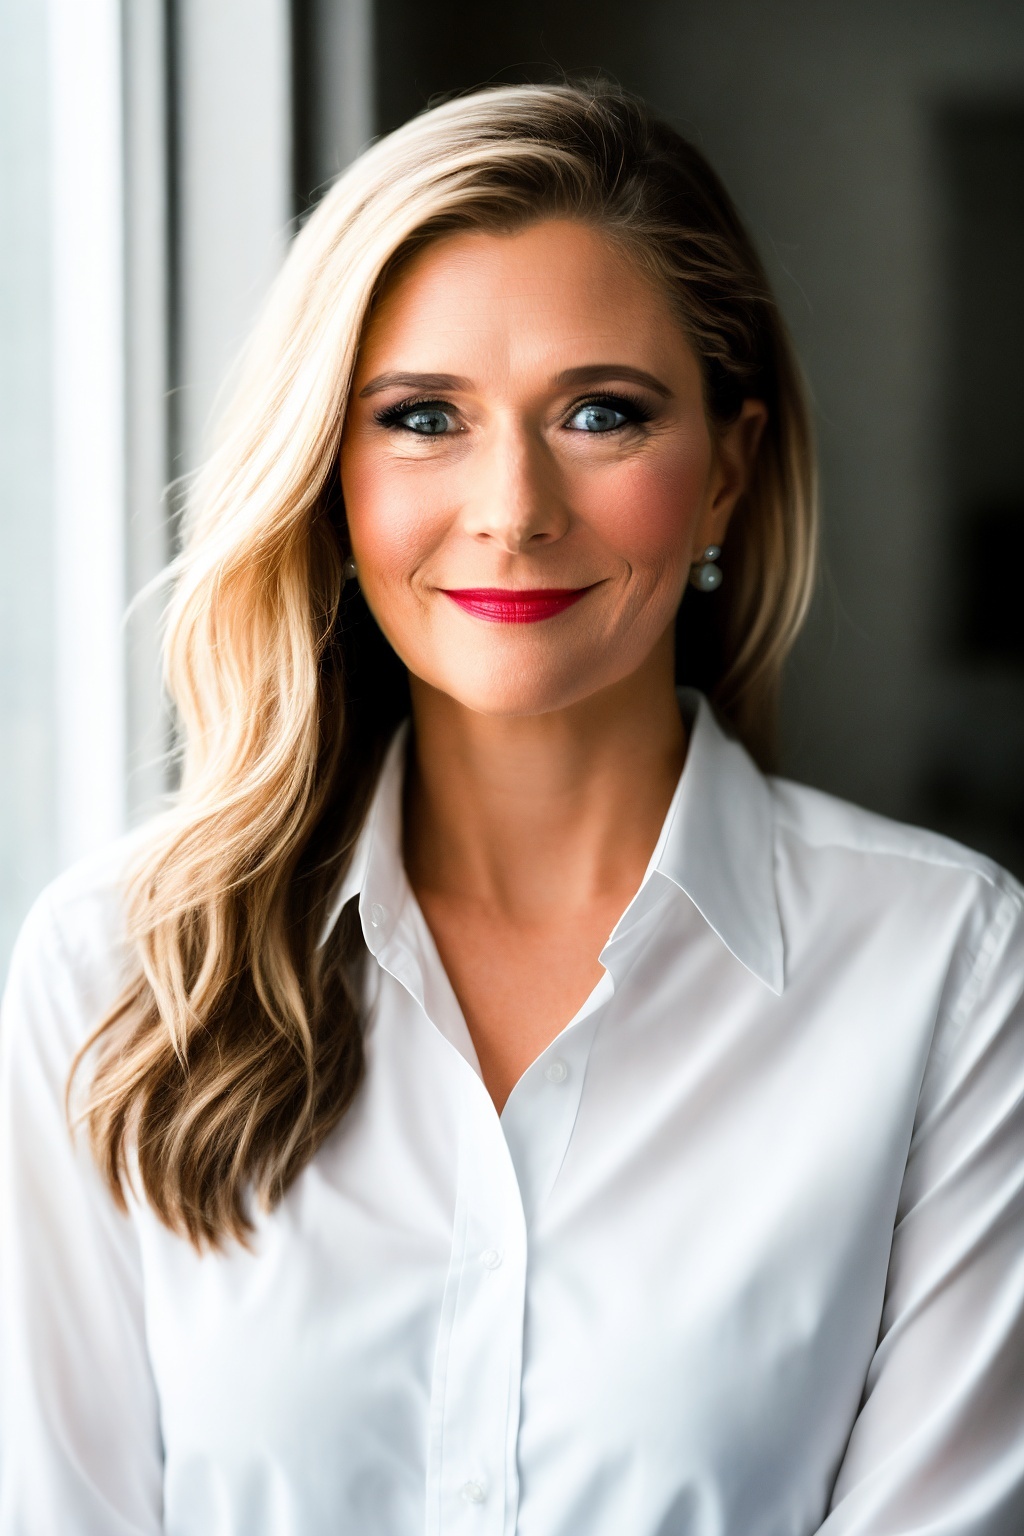
Front Lighting: When the light source is directly in front of your subject, it evenly illuminates the face, reducing shadows and creating a soft, flattering look. This type of lighting is ideal for capturing details and achieving a clean, bright image.
Side Lighting: Positioning your subject so that the light comes from the side creates a mix of light and shadow, adding depth and dimension to the portrait. Side lighting is excellent for emphasizing texture and contours in the face, giving your portrait a more dramatic effect.
Backlighting: When the light source is behind your subject, it creates a halo or rim of light around the subject, adding a sense of depth and separation from the background. Backlighting can be challenging to master, but when done correctly, it can produce a stunning, ethereal look.
Top Lighting: This lighting comes from directly above your subject. While it can create harsh shadows under the eyes and nose, it can also be used creatively for a dramatic effect. Reflectors can be used to fill in shadows if needed.
Experimenting with these different lighting positions can help you discover the best way to highlight your subject’s features and achieve your desired look.
Using Reflectors and Diffusers to Control Light
While natural lighting is beautiful, it can sometimes be unpredictable or too harsh. This is where reflectors and diffusers come in handy. These tools allow you to manipulate and control natural light to achieve the perfect balance.
Reflectors: Reflectors are used to bounce light back onto your subject, filling in shadows and creating a more even lighting effect. They come in various colors, each providing a different effect:
- White Reflectors: Provide a soft, neutral light, perfect for filling in shadows without altering the color of the light.
- Silver Reflectors: Offer a brighter, more intense light, ideal for adding contrast and drama.
- Gold Reflectors: Add warmth to the light, creating a golden, sun-kissed glow on your subject.
- Black Reflectors: These can be used to subtract light, deepen shadows, and add more contrast to the image.
Diffusers: Diffusers soften and spread light, reducing its intensity. They are instrumental on bright, sunny days when the light is harsh. A diffuser can be as simple as a translucent umbrella or fabric placed between the sun and your subject. This softens the light and creates a more flattering effect, similar to the quality of light during the golden hour.
By using reflectors and diffusers, you can achieve more control over natural light, allowing you to capture beautiful portraits in various lighting conditions.
Finding the Right Background and Location
The location you choose for your portrait shoot plays a significant role in how natural light interacts with your subject. The environment can affect the quality and direction of light, so it’s essential to choose your location carefully.
Open Shade: One of the best places to shoot portraits in natural light is in open shade. This can be under a tree, near a building, or any area where your subject is shielded from direct sunlight but still receives plenty of ambient light. Open shade provides even, soft lighting that is ideal for portrait photography.
Reflective Surfaces: Locations with natural reflectors, such as light-colored walls, sand, or water, can help bounce light back onto your subject, filling in shadows and creating a more balanced image. Be mindful of unwanted color casts that these surfaces might introduce, and adjust your white balance accordingly.
Natural Frames: Look for natural frames within your location, such as archways, windows, or tree branches, that can help direct light toward your subject and add a sense of depth and composition to your portrait.
By considering your location and how it influences the light, you can enhance the overall look of your portrait and create a more compelling image.
Camera Settings for Natural Light Portraits
Achieving the perfect exposure is crucial when shooting in natural light. The correct camera settings can make all the difference in capturing the beauty of natural light in your portraits.
ISO: To reduce noise in your image, start with the lowest ISO setting possible. On bright days, this might be ISO 100 or 200. In lower light conditions, such as during the blue hour, you may need to increase the ISO to 400 or 800 to maintain a fast enough shutter speed.
Aperture: A wide aperture (f/1.8 to f/4) is ideal for portrait photography. It creates a shallow depth of field, blurring the background and drawing attention to the subject. However, be mindful of focusing accuracy when using a vast aperture, as the depth of field can be pretty narrow.
Shutter Speed: Your shutter speed should be fast enough to avoid motion blur, especially if you or your subject are moving. A good starting point is 1/125th of a second, but you may need to adjust based on the available light and your lens.
White Balance: Natural light changes throughout the day, affecting the color temperature of your images. Adjust your white balance settings accordingly, or shoot in RAW to have more flexibility in post-processing.
Exposure Compensation: Depending on the lighting conditions, you may need to use exposure compensation to avoid overexposed highlights or underexposed shadows. For example, when shooting in the backlight, you might need to increase exposure compensation to ensure your subject’s face is lit correctly.
Experimenting with these settings will allow you to capture the natural light in its most flattering form and achieve stunning portraits.
Post-Processing: Enhancing Natural Light Portraits
While getting the lighting right in-camera is essential, post-processing can help enhance the natural beauty of your portraits. Here are some tips for editing natural light portraits:
Adjust Exposure: Fine-tune the exposure to ensure your image is well-lit and balanced. If the image is slightly underexposed, gently lift the shadows and highlights without losing detail.
White Balance Correction: If the color temperature is off, adjust the white balance to achieve natural skin tones. This is especially important if you notice a color cast from surrounding surfaces.
Dodge and Burn: Use the dodge and burn tools to enhance the light and shadows, adding depth and dimension to your portrait. Be subtle with these adjustments to maintain a natural look.
Add Contrast: Increase the contrast slightly to make your subject stand out. Be careful not to overdo it, as too much contrast can lead to a loss of detail in the highlights and shadows.
Sharpening: Apply sharpening to bring out the details in your subject’s face, eyes, and hair. Use a light hand to avoid creating an unnatural, overly crisp look.
By combining these post-processing techniques with your natural light photography, you can create portraits that are not only beautiful but also retain the authentic quality of natural light.
Mastering the use of natural lighting in portrait photography is a skill that can elevate your work to new heights. By understanding the qualities of light, choosing the right time of day, positioning your subject effectively, and using tools like reflectors and diffusers, you can harness natural light to create stunning, professional-quality portraits. With practice, experimentation, and attention to detail, natural light can become your most powerful ally in creating beautiful, timeless portrait photography.